Wednesday, August 11, 2010

How to sing Bad Romance like Lady Gaga

  1. Warm up your jaw muscles. Open your mouth by letting your jaws down a few times.
  2. Play the song on your computer, phone, iPod, whatever.
  3. Begin with "rahh, rahh, rah-ah-ahhhh". When singing, keep your mouth open as tall as you can.
  4. Refer to lyrics below to finish.
♫ ♩ ♪ ♬ ♪♪

Thursday, May 6, 2010

Day 2 of 30 days with Ubuntu

I have created (yet) another blog, 30 days with Ubuntu. Two days ago, I reformatted my laptop (and lost all my photos which I cleverly forgot to backup) and installed the newest version of Ubuntu, version 10.04 which was released just a week ago. I will be using Ubuntu for 30 days, and as I go, every day I will may write my experience with Ubuntu, on things such as how usable it actually is, whether it can really eliminate my dependency on Windows, etc.

Do take a look at 30 days with Ubuntu if you are interested or considering to try a Linux operating system.

If you don't know what Ubuntu is...

Tuesday, April 27, 2010

Tip #35: Burn disc images without third-party apps in Windows 7

NO - again, disc images are not photos of CDs.
(Photo credit Alison Ng)
Have you seen files ending with .iso, .img or .nrg before? Those are called disc images (no, not photos or pictures of CDs). A disc image is a snapshot of the contents of a CD or DVD, be it a data CD, audio CD or video DVD. You can think of disc images as zip files, which contain files copied from a CD or DVD. Disc images are convenient because they let you store whole CDs and DVDs on your hard drive for easy retrieval. You can also burn an image file onto a CD or DVD, in other words, make copies of a disc. Often, disc images are used to distribute operating systems such as Linux and the release candidate version of Windows 7 (during the testing period before launch).

If you've used disc images before, then you may know that in prior versions of Windows, you need to use a third party burning application like Nero or Roxio to burn the image onto a disc. New to Windows 7 is native support for .iso and .img images. In other words, you can now burn image files of these formats, without having Nero or Roxio installed.

Thursday, April 8, 2010

Tip #34: Make your Windows PC "brand new" by reformatting it

Time and again I have heard people say that they want to reformat their Windows PC, but they don't know how to do it. And there are actually people who dare not reformat their PC because they fear that they might lose all their data. Mind you, the word "reformat" already makes it clear that you are going to wipe clean everything from your hard drive/partition with Windows on it and reinstall a fresh copy of Windows with nothing except the bare essentials like Windows Media Player and Internet Explorer (no Microsoft Office nor Works included, you will have to install that yourself). To put an end to this, I have decided it's about time I pen down this common computing practice in writing.

If your PC was purchased from an OEM like Dell, HP or Acer, you might have a recovery partition hidden in your hard disk which you can access by pressing a special key combination before Windows starts up when you turn on your PC. This method restores your PC to its original state as when it left the factory. Steps for this vary between OEMs, hence I will not go into detail on that here. Frankly speaking, I don't see why you would want to restore your PC to its factory default state with all the probably-useless applications your OEM has preloaded for you (things like HP MediaSmart, Acer GameZone, Dell Backup etc). If you do want them back, most of them can be downloaded from the OEM's website after you have reinstalled Windows.

To reformat your computer (without using OEM recovery methods), you will need:

Saturday, April 3, 2010

How to stop falling asleep while driving

(Why is this tip totally random and unrelated to computer stuff?)

Late night assignments got you sleepy on the next day and you still have to drive to college? If you're worried that you might accidentally nod off while driving...
  1. Put some chewing gum in your car. Whenever your eyelids begin to feel heavy, pop one into your mouth and chew away. If it helps, it's either because of the sugar, or the chewing action that keeps you awake.
  2. Adjust your seat. If you normally drive with your seatback slightly reclined, make yourself less comfortable by straightening your seatback, so that you are forced to sit in an upright position.
  3. Sing along to the radio. If the radio is churning out ads, switch to another channel that's playing any song. Sing along to it, even if you don't know the lyrics.
  4. Skip that song. If your radio is playing some hypnotic club hit or electronic track with repetitive tunes, skip to something else like pop or rock.
Lastly, if you still have trouble staying awake, consider taking public transport (if it's available) or get someone else to drive.

Credits go to Zong Yuan for tips 2 and 3.

Tuesday, March 30, 2010

Tip #33: Turn your Windows 7 PC into a Wi-Fi hotspot

One of the not-so-well-known features of Windows 7 is the ability to turn your laptop (or desktop with a wireless card) into a wireless access point, aka Wi-Fi hotspot. If you are using a USB 3G broadband such as those from Maxis, Celcom and DiGi, or the Wiggy from P1, this would let you finally be able to share your Internet connection with others wirelessly, like the Wi-Fi modems which Streamyx and P1 give.

Again, a gentle reminder, you need to be using Windows 7 in order to do this. First, to check to see if you already have the necessary driver/software for this. To check, click on Start, type "view network connections", and press Enter. You should see all the network cards which your PC has. Look for one which says "Microsoft Virtual WiFi Miniport Adapter". If you have this, it means you're just a few commands away from using your PC as a hotspot!

Saturday, March 27, 2010

Tip #32: Shrink your current disk partition to create new partitions

Most new PCs come with only a single partition
for programs and files.
Reader Kam Yew recently received a new laptop with Windows 7. He pointed out that in Tip #15: Disk partitions, or "I have a C and D drive in My Computer", there were no steps on how to create a second partition if there is already a single partition occupying the entire hard disk.

Most new laptops or desktops purchased from an OEM (original equipment manufacturer) like Acer, HP and Dell usually come with only one usable partition whereby the operating system is installed and where they expect you to store your files. If you're not happy with that, it is possible to shrink (make smaller) that partition so that there is room for a second partition.

To do this, you must be using either Windows Vista or Windows 7. Windows XP is not capable of shrinking partitions. And like all potentially-dangerous disk operations, there is always a possible chance of losing data, so do a backup if you can. With that in mind, let's get started.

Tuesday, March 23, 2010

Tip #31: Custom searches from the Google Chrome address bar

If you are using Google Chrome, then by now you should have probably noticed that you can immediately begin a Google search by typing directly into the address bar (aka "Omnibox"), instead of going to www.google.com and searching from there. But did you also know that you can perform custom searches, i.e. search using other search engines or websites, from the address bar too?

For instance, I can search for an article on Wikipedia, just by typing "wiki", followed by the search terms into my address bar and pressing Enter, like this.

Saturday, March 20, 2010

Tip #30: Use Wikipedia to find rare characters instead of using the Character Map

The Character Map hasn't changed much since
it was introduced.
From time to time we occassionally need to type a seldom-used character which is not on our keyboard, be it Greek letters such as alpha α, beta Î², omega Î© for maths, or some weird symbols or letters for wonderful screen names like ––––•(-• ¥Ã¸Âµr ¯|¯Ã®Ãž Jã® •-)•–––– to put on MSN. The usual drill would be: go to the Character Map in Start > Programs > Accessories > System Tools, look for the character you want and then copy and paste it whereever you need it.

But browsing through the grid of characters is quite a pain for the eye, and sometimes you might end up not finding what you need. There is a simpler way than torturing your eyes with the Character Map, and this is when Wikipedia comes to the rescue! Wikipedia has articles for so many things, they have individual articles for symbols like the therefore sign ∴ and even every single letter in the Roman alphabet.

Wednesday, March 17, 2010

Tip #29: Convert music files from any format to any format

If you read this earlier post on how to import FLAC files into iTunes on Mac and were like "damn, what about us iPod users using Windows?", then this tip is especially for you. dBpoweramp Music Converter (for Windows, can be run on Linux using Wine [sorry Macs! nothing for you this time] ) can convert your music files from nearly any format to any format you could possibly think of (and perhaps even formats you have never even heard of).

But wait - what does this have to do with our previous problem of iTunes on Windows not being able to deal with FLAC files? We will use dMC to convert the FLAC files into Apple Lossless format, which iTunes can natively support. Additionally, we can also use dMC to convert the FLAC files into Windows Media Audio Lossless format, so that those who are using Windows Media Player need not go through the process of installing FLAC codecs and tag support for Windows Media Player.

Monday, March 15, 2010

Introducing: Blogger's new Template Designer

Notice something different around here?


You probably wouldn't believe me, but to switch to this new template involved only point-and-click - no need to search for a template file on another template website, download, copy and paste into the Edit HTML page in Blogger. Nor did I need to manually type HTML or CSS code (okay, I did type a bit to modify some things). Strange that you can't recall seeing this template I currently have (or even this one) in Blogger's set of default templates, no?

Saturday, March 13, 2010

Poll: If you could, would you ditch iTunes?

I don't have an iPod or iPhone, but I have experienced using iTunes before to load songs onto a Motorola Razr which had iTunes in it. Using iTunes was quite a pain then. Most of my songs ripped from CDs were in Windows Media Audio format, and iTunes converted all those files into AACs, thus I ended up having double-copies of some songs. Like how I see most people do, I had to manually search for album covers using Google and drag-and-drop it into iTunes. Song metadata wasn't automatically updated either. Windows Media Player, for example, can fill in the missing blanks in tags (i.e. you have the song title and artist, but not the album name). And recently, I covered the fact that iTunes doesn't play FLAC files or other new and emerging open source formats such as Ogg Vorbis. Shouldn't iPod owners have the freedom to use whatever file format they want to?

From what I heard, most people are forced to use iTunes, not because they like iTunes, but because they have an iPod or iPhone which they love, yet they cannot load songs just by drag-and-drop from My Computer. The truth is, there are alternatives to iTunes out there which can sync to your iPod/iPhone. Whether these media players also handle other stuff like syncing apps on the iPod Touch, or syncing your iPhone contacts with Microsoft Outlook - honestly I don't know.

Therefore, the first ever poll on Your Tip Jar, will be:

If you could, would you ditch iTunes?
(the poll is at the top of the sidebar)

If you are using an iPod or iPhone, please do submit your vote for this poll. If the response is good enough, I may test drive a media player called MediaMonkey, which can sync music to iPods, iPhones and a range of other devices, using my dad's iPhone or a friend's iPod.

A short disclaimer: the accuracy and reliability of the facts in this post can be severely disputed - as I stress the point again - I do not use iTunes.

Tip #28: Custom keyboard shortcuts in Windows

In Windows, you can create your own keyboard shortcuts to launch frequently used programs or to open commonly used files and folders, as long as there is already a shortcut icon to it.

If you are not sure what a shortcut is, a shortcut is an icon which links to a program, file or folder on your hard disk. Windows differentiates shortcuts from the actual files by adding a small arrow in the corner of shortcut icons (exception: most, if not all icons in the Start menu are shortcuts, however they do not have the small arrow). In this picture on the right, the icon on the left is the actual Photos folder, whereas the icon on the right is a shortcut to the Photos folder on the left. Double-clicking on either icon will open the Photos folder. Deleting the shortcut will not delete the Photos folder; deleting the Photos folder will break the shortcut (there is nowhere for the shortcut to point to). Also you can rename the shortcut to anything you like, say "Open Photos folder", but if you rename the original Photos folder, the shortcut will break too.

With that in mind, let's get to the part where we create the keyboard shortcuts:

Wednesday, March 10, 2010

Tip #27: Import FLAC into iTunes (on Mac) and sync to your iPod

Using iTunes on Windows? Read this post instead.

If you own an iPod, and you are seriously hooked on lossless music formats like FLAC (like me), you are slightly out of luck: iPods don't support FLAC, but they do however support Apple's own lossless format called Apple Lossless. On Windows, iTunes doesn't even let you import FLAC files into your library. I have found a tutorial to import FLAC files into iTunes on Mac, play them, and convert them to Apple Lossless for syncing to an iPod. The video did help a great deal, you can watch it to see it in action step by step, but the author did miss out a critical step. Here are the complete steps to do it if you are using iTunes on a Mac.

Monday, March 8, 2010

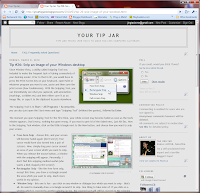
Tip #26: Snip an image of your Windows desktop

Since Window Vista, a utility called Snipping Tool was included to make the frequent task of taking screenshots of your desktop easier. Prior to that in XP, you would have to press the Print Screen key on your keyboard, open Paint or whatever program you want to use, paste and then save the print screen (how troublesome). With the Snipping Tool, you can immediately see what you captured, add annotations (markings, scribbles etc) and then either save it as an image file, or copy it to the clipboard to paste elsewhere.

The Snipping Tool is in Start > All Programs > Accessories; you can also just open the Start menu and type "Snipping Tool" (without the quotes), followed by Enter.

Sunday, March 7, 2010

Tip #25 [Word, Excel]: Undo and clear formatting styles

what do these icons mean?
While working in Office, some people might
get a bit too colourful or creative...
You just changed every single word in your Word document to a different font and size. Or you made a rainbow table in Excel while typing in your daily accounts. Now how do you reset your entire document, or spreadsheet, or part of either one, to the original font, size, style, color and everything?

In Word and Excel, there is a Clear Formatting tool which can turn everything back to boring, black-and-white, standard size 12 or 10, Times New Roman (in Word) or Arial (in Excel) or Calibri. Using the tool is a piece-of-cake: just select the text or cell(s) which you want to clear away all formatting, then click on the Clear Formatting icon or option in the menus.

Where can you find the Clear Formatting tool in Word and Excel?

Friday, March 5, 2010

Tip #24 [Word, Excel, Powerpoint]: Copy text formatting using Format Painter

what do these icons mean?
The mysterious paintbrush tool, which seems to
have done nothing so far to ease our Office tasks...
Perhaps like me, you have been wondering what that paintbrush icon in Microsoft Office is used for. I actually didn't know either, until quite recently (a few years back actually). The paintbrush tool, named the Format Painter, is used to copy and paste text formatting in Word, Excel, and Powerpoint.

Take note: the Format Painter lets you copy and paste (or paint/apply) formatting from one selected text to another, meaning font, size, color, background, line spacing, etc. It is different from the usual copy and paste procedure, which you will end up with a duplicate of the copied text.

How can we make use of the Format Painter to make our lives easier? Here's an example in Word.

Tuesday, March 2, 2010

Tip #23: More ways to create Wordles

If you can't get enough of those arty word clouds Wordle has been creating for you, here are some ways to make creating Wordles easier.

First of all, you might have noticed that Wordle treats each word in a phrase as seperate words, so long as they have a space in between. Suppose you wanted to create a Wordle of things to do when you grow up:
get a job, buy a car, marry someone, become your own boss, live on a golf course, retire early
To us, the commas make sense in that they divide the words into items or phrases. But when we try to create a Wordle by pasting the above text... we get this on the right.

Saturday, February 27, 2010

Tip #22: Create fancy word clouds for anything

Tags on Your Tip Jar so far, created using Wordle.
Word clouds (like the one shown here on the right) are fun, simple and artistic ways to convey a message. Creating a word cloud manually though, isn't really fun, and does require a certain degree of artisticness as well as computer drawing skills to achieve. Luckily, I've stumbled upon this online tool, Wordle, which lets you easily create nice-looking word clouds (called Wordles) like the one I created here, without needing much effort nor artistic capabilities.

The great thing about Wordle is that word clouds created using it are free for any use, as long as you attribute it to www.wordle.net (meaning, if you use a Wordle on your blog, you should have a link back to the website like in the caption on the right).

Thursday, February 25, 2010

Tip #21: Get Dropbox

  1. You have more than one computer (e.g. desktop and laptop), and you often find it troublesome to move files between the two.
  2. You are working on a team project, and you want to share files with group members and keep the files always up to date.
  3. You want to share some files for downloading from your blog, using a public link like this, but your file is too big for certain online file hosts. (e.g. Rapidshare has a limit of 200MB per file)
  4. You just want to store your files online so you can access them away from home.
If any of your needs look like the ones listed above, you need Dropbox. Dropbox is an online file storage service which gives you 2GB (up to 5GB via referrals) for free. You can use this 2GB to store any of your files, synchronise them among your computers (and iPhone), and share them with others who may or may not be using Dropbox.

Tuesday, February 23, 2010

Tip #20: Managing files in Windows quickly

This is how it's usually done with right-click.
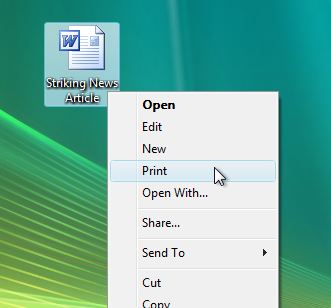
Things you can do with files in Windows: open, save, delete, rename, move, copy, etc. There are many ways to do these, the easiest is to right click on any file or folder, then choose an action to apply onto it.

Working with both hands on the keyboard lets you work faster. However, when you have tens and hundreds of files to organise, using the arrow keys to paddle around the folder may not be the ideal thing to do. Using the mouse to point-and-click would be faster, then to quickly apply an action on the selected item(s) we can use keyboard shortcuts so that the mouse isn't doing all the work.

Thursday, February 18, 2010

Tip #17: Become a tabmaster

Remember the old times when you had to do this?
Now that you can handle forms easily, today I'll show you how to master tabbed browsing. Back in the days of Internet Explorer 6, we would have to open one window for every single webpage, unless if you were using Firefox, Opera or Safari then. With the introduction of IE7 a few years back, tabbed browsing became mainstream. Yet, there are still some people around me who don't know how to use tabbed browsing!

Just in case anyone here is still not aware of what tabs do, tabs let you open multiple pages in a single browser window, so that you don't clutter your taskbar (the long bar with the Start button below) with lots of instances of your web browser. Having multiple instances of your browser open slows down your computer during heavy browsing. Of course, this doesn't quite apply in Mac OS X, since there is only one icon of the running program shown, but still you would have to right-click on the dock icon to pick which Safari window to show, like how Windows XP grouped similar taskbar items together.

Wednesday, February 17, 2010

Tip #16: Master the art of filling up forms

What if you could jump from field to field?
We spend most of our time on the Internet, and often we need to fill up forms online, especially when logging in to websites. Some websites' registration forms have tens, if not more fields for you to fill up. As mentioned in this previous tip, shifting one hand back and forth between the mouse and keyboard slows you down. To be able to fill forms more quickly, we will need to eliminate this inter-keyboard-and-mouse switching.

This tip should apply to any browser on any operating system. If something doesn't work for you, please let me know so I can help you find a solution for it.

For you to follow along, I have created a dummy form right here for you to try out the keyboard shortcuts as you read!

Monday, February 15, 2010

Tip #15: Disk partitions, or "I have a C and D drive in My Computer"

A peek in My Computer...
Most Windows computers have two hard drives visible in My Computer, usually named C: drive and D: drive (or E: drive). Often, I hear them say "I have two hard drives" - this is usually not true, if your desktop was just purchased, or if you are using a laptop. In actual fact, there is usually a single hard drive, which contains two partitions, shown as two seperate drives in My Computer.

Imagine that we have a huge rectangular apartment with an area of 320 m2 and has no walls, which we can both live in it and use as a store room to keep things. A room this big may be difficult to organise its contents and you certainly don't want to live among your pile of collectibles or junk. To make life easier, we could divide the room into one or more smaller rooms by using wall partitions. I could divide the apartment into two smaller rooms or "partitions", one that is 120 m2 which I use as my living space, and the other which is 200 m2 which I use as my storeroom (so I don't need to look at the mess all the time). How nice!